
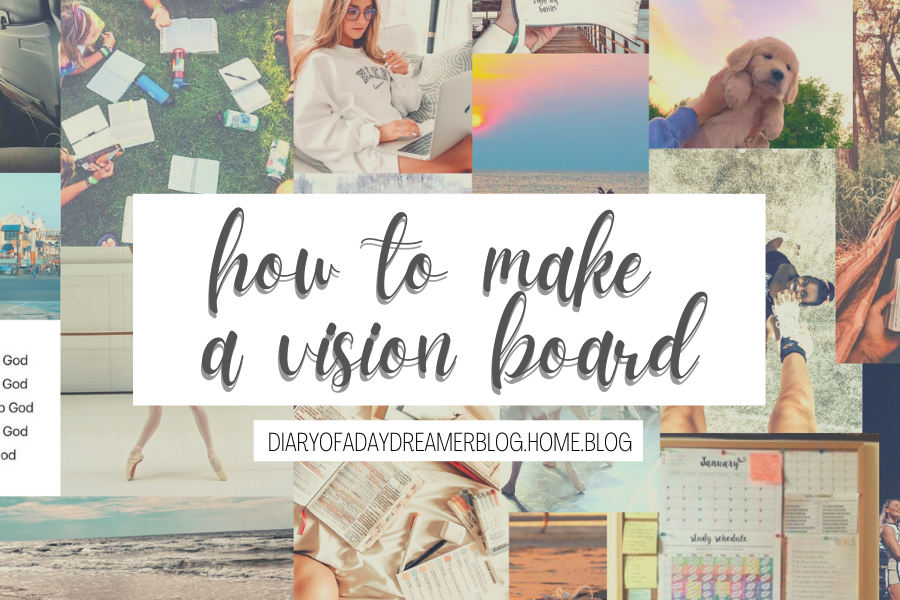
Hey daydreamers! I recently did a review of the Bloom planner, and one of the pages in it has you create a vision board. I asked you guys if you wanted to see a full tutorial on how I made mine, and you guys loved the idea! This post has also been on my blog idea list for awhile. So, here’s the long-awaited (haha not really) vision board tutorial!
Vision boards are a great way to inspire yourself to achieve your goals. It’s the perfect way to visualize them (hence the name, vision board 😉)! I’ll be showing you some different ways to make both a digital one or a physical one. Let’s get right into the post!
1. Write Down Your Goals
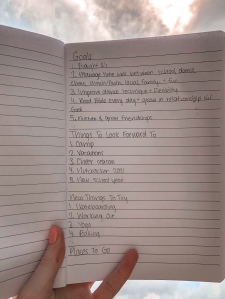
I found it super helpful to write down my goals before I made the vision board so I would know what pictures to look for. I used this template (and also this template), where you could write down goals, some things to look forward to, new things to try, and places to go in the upcoming year, school year, summer or future.
2. Find Pictures

The next step is to find pictures on Pinterest, or from your own camera roll! You can choose photos that relate to your goals. For example, if you want to make time to read the Bible everyday, pin pictures of Bible journaling. You can also pin pictures that inspire you, like travel destinations, quotes, or verses. You can use ones that just make you happy to look at, like a pic of you and your friends or a cute puppy. 😄
I found it helpful to create a Pinterest board of everything I wanted to include in my vision board, so that it was super easy to upload the photos to Canva, since they were all in one place.
3. Make a Collage
This next step is to make a collage! I used Canva to make mine, but you could also use the app PicCollage or just good-old-fashioned cutting and gluing. I’ll be showing you how to make one in Canva more in-depth, since that’s just what I did, but I’ll try to explain the other options too!

Just start by creating a new design. If you’re putting your vision board on a frame or bulletin board or something like that, you’ll want to measure it and enter the dimensions when you create the design. I just used the desktop wallpaper size.

Next upload the images from Pinterest to Canva, and start placing them! This is pretty self explanatory. You basically just play around with different sizes and how the pictures can fit together.

Here’s what it looks like almost finished!
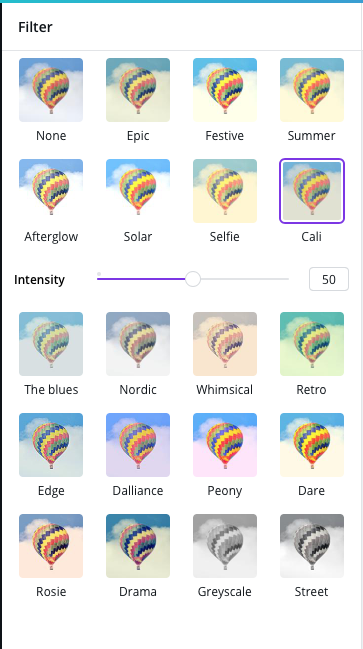
Adding a filter makes the collage look more cohesive, so I used one called Cali.

And the collage is finished! You could either use this as your wallpaper, or print it out. The filter makes a huge difference – now all the photos match.
You could also use the app PicCollage to make your vision board. Just upload all your images into the app and choose the size you want, and it will automatically put the collage together for you. Another option is to print out each image, cut them out, and glue them to a poster board or piece of cardstock.
optional: add quotes
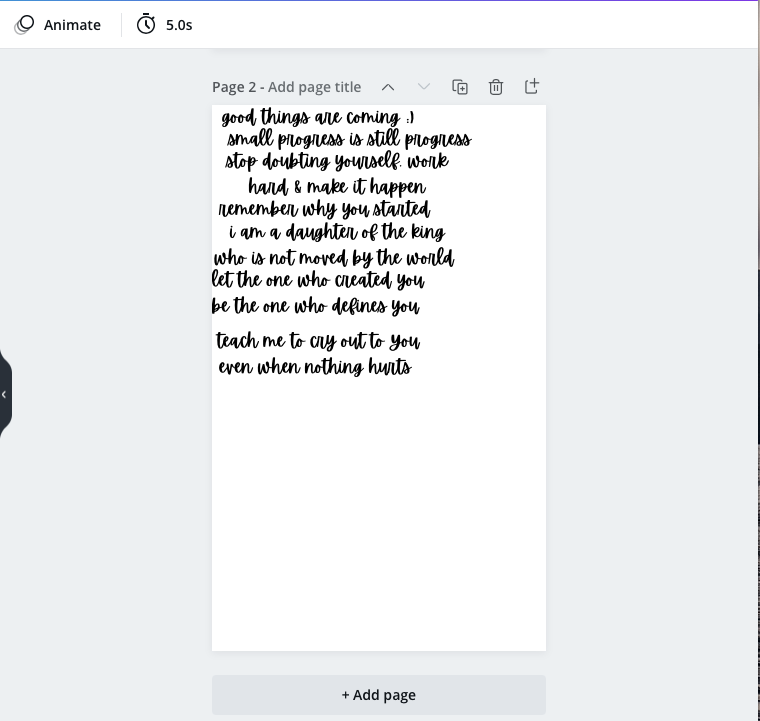
I found some different inspirational quotes on Pinterest and typed them out in Canva and printed out the page.
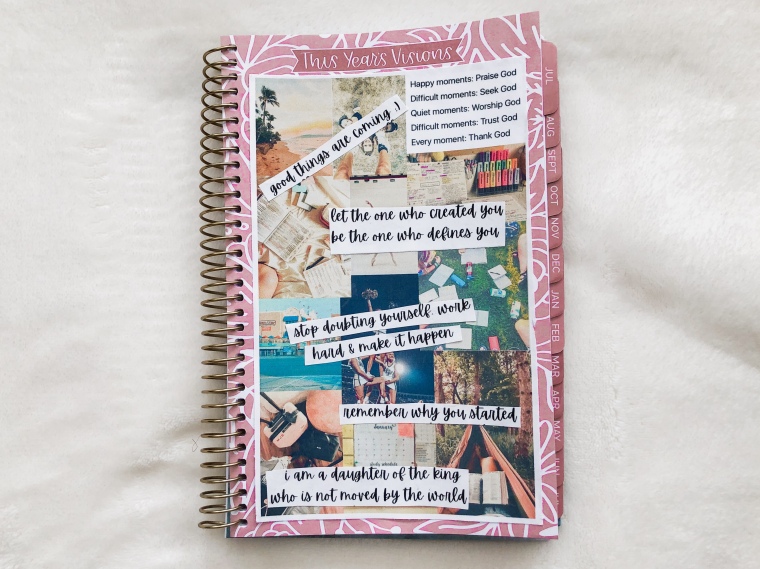
Then I just cut out each quote and glued it to my collage!

And that’s it! Super easy and a great way to fill a summer afternoon, and it helps motivate and inspire you! The final step is just to put it somewhere you’ll see it, like in your planner or on your wall.
Hopefully these instructions weren’t too confusing! Let me know if you make this, and have a great rest of your week. See you soon!
Are you going to make this? Have you ever made a vision board before?


Ooh! I literally was making one as I was reading your post!
LikeLiked by 1 person
No way! That’s funny!
LikeLiked by 1 person
This is great!! Thanks for the how-to!
-Haley
LikeLiked by 1 person
Thanks! You’re welcome! 😉
LikeLiked by 1 person
I love this! I wish I had a cute puppy to put in my collage, but I guess my grandma’s will have to-do;)
LikeLiked by 1 person
Thanks! Aw that’s fun that your grandma has a puppy.
LikeLike
Thanks for this! I’m going to make one rn XD.
LikeLiked by 1 person
Np! XD Let me know how it turned out!
LikeLiked by 1 person
That’s so cute!
LikeLiked by 1 person
Thanks!
LikeLike
Oh my gosh! This is such an amazing post!❤️ So helpful, and the aesthetic in this post was beautiful!🤩 I’m going to make one soon!😁 Thank you!😘
LikeLiked by 1 person
Aw, thank you so much! I’m so happy you liked it!
LikeLiked by 1 person
😍😍
LikeLike
This is soooo beautiful I love it 😍
LikeLiked by 1 person
Thank you Madi!
LikeLiked by 1 person
That is so pretty!! I think I’ll make one soon! Thank you for the awesome tutorial. 😜💙
LikeLiked by 1 person
Thank you! Super happy you liked it!
LikeLiked by 1 person
This is absolutely lovely! So bright, happy and inspirational. Thank you Emmie! 😊
LikeLiked by 1 person
Aw thank you! I’m so happy you enjoyed it!
LikeLike
this is so cute!!
LikeLiked by 1 person
Thanks!
LikeLiked by 1 person